How to practice gratitude everyday!

Hi and Happy Thanksgiving!!

This is one of those days that we reminisce about all of the beautiful things that have happened throughout the year. One day that we spend with our families and get to have the whole day filled with love and gratitude.

As I was thinking about Thanksgiving this year, I thought about the practice that I have been doing for the past few months. It brings the thankfulness that we feel each Thanksgiving day to your daily life.

Here’s how I practice gratitude every day of the year:

Write. It. Down.

All of it. The small things. The big things.

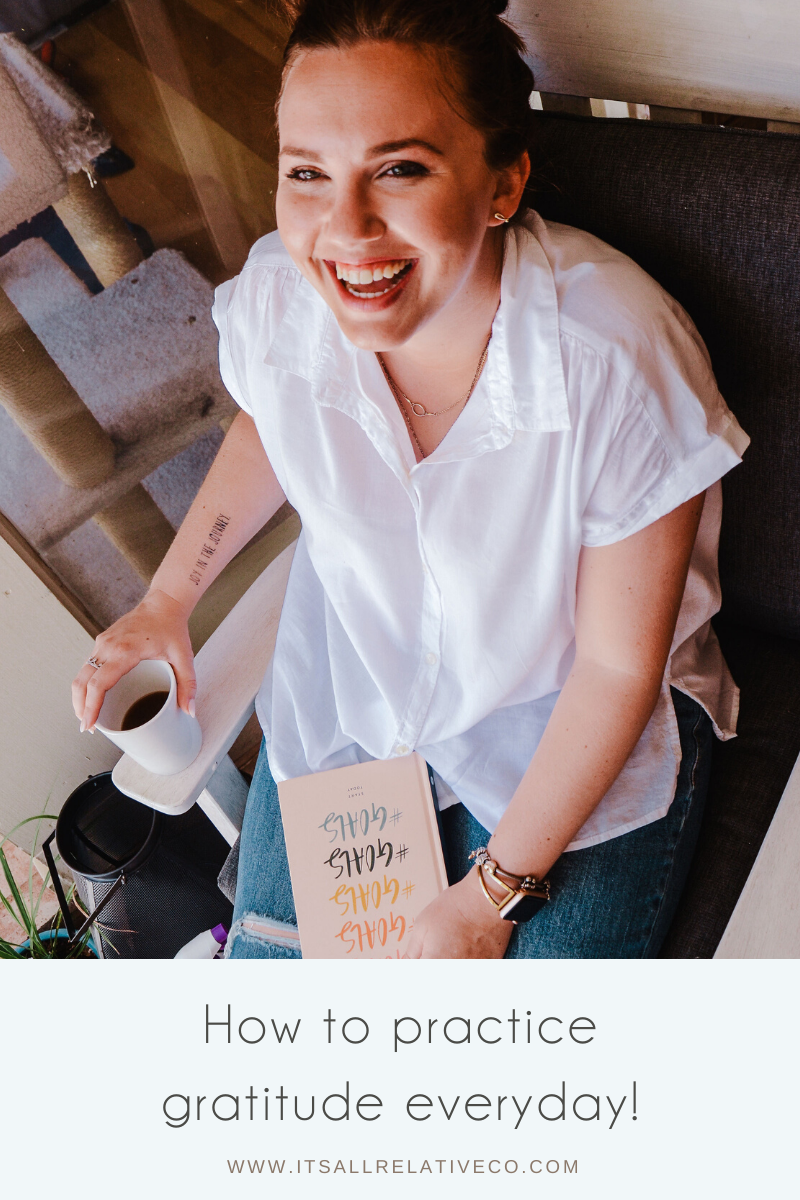
I started this habit last year as a result of my slight obsession with Rachel Hollis (ever heard of her?!) She has given me so many tools to change my life! One of them being the Start Today Journal. I did this practice without the journal for the first 6 months or so, and then finally jumped all in and bought the specific journal! You write down 5 things each day that you are grateful for. You may think “okay, that’s easy.” Here’s the deal. It’s super simple, but not easy! You will be surprised to see that you get to the end of the day and can’t remember things that happened that made you smile. The whole practice is meant to make you seek out the small beautiful things in each day. Talk about life changing!

Another thing that I have taken up more recently is something called a brain dump. This is when you sit down at the beginning or end of the week and taking everything out of you brain and put it all on paper. No thinking. All of your to-do’s, all of the thoughts you have had this week, all of your hopes, goals. Literally all of it. This way you can see it, make a plan, and live more in each moment rather than being busy all of the time.

I know these two things have made me live each day a little differently. And I have seen huge changes. This is the perfect time to start! Make it a habit even before the New Year!

Do you have any tricks for being intentionally grateful each day?? I would love to hear it! I’m always looking to put more tools in my tool belt!

Now go enjoy that family time and pumpkin pie!

Ashley WisemanComment
Day to Date Night Makeup

So since last week we talked about some great date night ideas, I thought I would write up a post about about how I get ready for said date nights. I put together a video of me getting ready for our date night this week, because frankly thats easier and more entertaining then me writing about it!

I also feel like it's important to say that you definitely do not have to get dolled up for a date night or any outing for that matter!  I mean, I have been known to show up at the movies in sweatpants and a baggy t-shirt.  However, if not now then when?? I live a normal everyday life, so if there was ever a time to where a bold lip and some glittery eyeshadow, it's date night!

Check out the video for all the details!


Ashley Wiseman Comment
Date Night Ideas

Rhett and I have a date night every week.  99% of the time it is on Tuesday.  100% of the time it happens in some form or another.  Why? Because we made a commitment to put our marriage and relationship above everything else. I know that sounds dramatic, but how many times does an entire week go by and you realize you have only talked to your spouse or significant other about dinner or work or what the kids have to do this weekend?  I'm going to bet a lot more than you would like to admit. 

So when you go on date night once a week, it can become routine and munotenous.  Especially when you have a movie junkie husband like I do! So I decided to put together a list of date night ideas that aren't boring! Or at least, I don't think they are boring.. But i'm basically 400 and like staying in my house where it's warm and smells nice!

1. Date night @ home

No one said you had to go out or spend money to have a date night.  Rent a movie, pop some popcorn, order in, make pizzas, play a card game.  There are so many at home date night options! The important thing is to spend some quality time with your SO. Some of our favorites are game nights! Rhett is definitely competitive, so he loves when we break out the board games! One of my favorites from this summer: picnic in the backyard! Some that I am looking forward to this winter: Hot chocolate date, cookie making, and obviously tree decorating!

2. Movies

This is probably the most obvious one.  This is usually our go to because it takes very little planning and Ticket Tuesday is a thing through AMC.  Hello $5 movies!  You just can't go wrong. That means with dinner and a movie, we spend less than $40! We make a list of all of the movies that we want to watch throughout the year. This way we know which days we need to find something different to do!

3. Paint Night

Okay, stay with me here.  I know you’re thinking, "No way, my SO won't be down to drink wine and paint a landscape".  I'd bet, if you asked him nicely with your sad puppy dog eyes, he'd go with you. And then he will love it!   Because it's super relaxing and fun and you get to laugh at yourselves! This is exactly what happened with Rhett and I. I had been wanting to do a paint night, you know the one where you send in a photo of your pet and then you paint them?! I talked him into it, and when we left that night he said that was one of the most fun date nights we had had. We got to talk, laugh and drink! Just try it!

4. Mini golf or Bowling

Who doesn't love a good mini golf/bowling night?? I know that I personally am TERRIBLE at both, but I have such a good time! It’s another one of those times that we get to laugh (usually at myself) and talk! Plus, this is the perfect time to make it a double date or invite some friends! When you commit to a date night once a week, it is 100% okay to invite others into them every once in a while!

5. Dog Park/A walk

We have two miniature dachshunds, so when it's super nice out, aka when the sun is out and the wind isn't blowing 4000 miles an hour, we take the puppers for a walk! Exercise plus quality time?? Double win! Plus, this gives you a chance to be in nature and find different parks in your areas! This is truly one of my favorite ideas!

Basically, it doesn't matter what kind of date night you have.  It just matters that you are taking time for your relationship. I know work can get crazy busy and the kids have 100 activities each and the laundry really needs done and…. That’s why this is so important. These are the moments that matter! Especially during the holidays!

If you have any great date night ideas, let me know! We are always looking for new things to do!

Ashley WisemanComment
5 perfect products for winter

Hi all! 

Fall is finally here and so are the cold temperatures and dry skin! Well guess what! I'm here to tell you that you can have your cozy sweaters and hot chocolate without the dry lips or hands!  This is my absolute favorite time of the year, but it can bro harsh on our skin. We are constantly washing our hands because of course it’s flu season and the baking is getting pretty serious! These are some of best products that I have used to keep my skin healthy!

 1.  Shea Butter Body Cream

     The name basically says it all.  Shea butter? Check. Vitamin E? Check. Luxurious texture with small enough molecules to moisturizer deep? Check.

Not only does it have all of the great things listed about, it also has SenePlex complex that will excelorate skin regeneration for luminous skin! Want to know a secret? I also use this product to remove my makeup every night! It is the best for my sensitive skin and gets every bit of my Waterproof mascara off easily!

2.  Lip Balm 

     Liquid. Gold.  That is all I have to say about that. Well not really.  It is Shea Butter and Vitamin E (notice a theme yet?)  It takes so little and does so much.  I don't want to say it can "heal" your lips, but I will say that you can legit tell a difference within a couple days, if not over night, of using it.  

I added a bonus product that goes perfectly with the Lip Balm. The perfect lip duo includes the a moisturizer and a scrub! And this is just that! This Lip scrub gently conditions the lips with non-abrasive natural exfoliators! Plus, it smells like vanilla cake batter and who doesn’t love that?!

3. Climate Control

    This product is pretty much a miracle in a bottle. I know that sounds crazy and dramatic, but it is so true.  It is hydration in its purest form.  It is made up of the smallest molecular weight and rushes new skin cells to the surface 23.3% faster! The molecules are legit so small that they have to be sealed in with a moisturizer in order to stay on your skin. Why do the small molecules matter? The smaller the molecule, the deeper it can go into the skin. Therefore Climate Control is able to hydrate your skin from the inside out!

4. Facial Resurfacer

    Exfoliation is SOO important! It is so beneficial to schluff off all of the dead skin cells that build up. Your skin is constantly exfoliating, you have to remove it or it will build up and create a harsh layer on your face that won’t allow products to penetrate! I stopped using this once.  And I regretted it immediatly.  I could see the distinct difference it made in my face.  Exfoliation is key people!  It allows new skin cells to be at the top and for products to do what they are meant for! This means hat your skin will always be more luminous, less wrinkles, and younger looking!

5. Hand Cream

Life [hand] savers! I used to suffer from really dry hands every winter.  Like cracked knuckles, dry.  TMI? Sorry.  But I know there are a lot people that have this same issue! Especially if you work outdoors or are a major hand washer! This will change your hands! Did you know that the three things that give away your age are: face, neck, and HANDS! They get put through the harshest of elements, especially in the winter!

And that is it!  My top 5 favorite winter products! Do you want to know the coolest part? Every single person in your life will love these! That means that make the perfect stocking stuffers or dirty Santa gift! Don’t believe me? Every single person in my life uses one or more of these everyday. My husband, mom, dad, brother, so many friends, and of course me!

You can check out the key ingredients for these products and even more uses here!

Ashley WisemanComment
How to pack for a week in a backpack

So the hubs and I went on a 5 day vacation to Washington DC a few months ago! It was so amazing and such a fun getaway! Our flights were super early getting in and late leaving so we would have as much time as possible in the city! We stayed in an AirBnB this trip, and because of that and the flights we had to be a little bit strategic with our packing! We didn't want to have to roll our bags around before check in or after check out! We had quite a few hours that our luggage would have to be with us so we wanted to be able to still go out and have fun without looking like super dorky and unprepared tourists!

I'm going to preface this with I am usually a way over packer! Like 12 outfits, 30 pairs of underwear/comfy clothes for a 5 day trip would be my norm! So I had to scale way back and think about how I would specifically wear each piece! 

How to-6.png

What I brought:
1 pair of jeans

A jumper

Black maxi dress

Denim dress

3 t-shirts/tank tops

Army jacket

1 Cardigan

3 pairs of shoes

I wore my bulkiest clothes to the airport aka my jeans, jacket, and tan slip ons.  I usually where jeans twice before I wash them, so they made the perfect travel day outfit! And I was able to just change out the shirt and where basically the same outfit back! I then was able to wear the dresses and jumpers the other days and add a cardigan or jack to make it nicer/more evening wear appropriate! 

For makeup I took my capsule makeup products!  5 shadows, my lash trio, foundation and liner! I added a couple of LipSense colors that I could layer and wear alone that would go great with each outfit for day and night.  

I obviously packed all of my skincare and toiletries in a clear bag that way I could easily pull it out as we went through TSA! I have been using the Oily to Acne line from SeneGence and adding Nangia Oil at night and it has completely changed my face! 

And thats it! I was super impressed with myself for how little I packed and it actually took a lot of anxiety out of packing and while I was there! I hope this is helpful if you are wanting to take a vacation and not wanting to check a bag! 

This would be even easier for beach vacations or summer trips where jackets and closed toed shoes aren’t necessary! We are headed to the beach for a vacation in a few weeks! We are actually going to be able to both pack in one larger backpack since all of out clothes will be smaller!!

Leave a comment if you have any packing tips I didn’t share or find this post helpful!

Ashley WisemanComment
Quick & Easy Fall Makeup

Okay, so we have officially entered sweater weather season and I legit could not be happier! I wanted to share this quick makeup look with you guys because it has been my fave! So many of these products are used in every makeup look I do! Plus, most of the shadows I used, I used in more than one way! How cool??

Here are the details:

Eyebrows: Rustic Brown ShadowSense

Concealer: Candlelight ShadowSense

Foundation: Dewy Original Foundation

Base/Transition color: Moca Java ShadowSense

Outer corner color: Rustic Brown ShadowSense

Inner corner color: Sandstone Pearl Shimmer ShadowSense

Undereye Highlight: Whisper Pink ShadowSense

Bronzer: Moca Java ShadowSense

Blush: Pink Posey ShadowSense

Highlight: Sandstone Pearl Shimmer ShadowSense

Lash Primer, VolumeIntense Waterproof black mascara

Nude Pink LipSense, Glossy Gloss

Check out the video below to follow along and see how easy it is for yourself!

Ashley WisemanComment
Our Kitchen Remodel

EDIT:

*Well, it’s 2019 and we have been loving our kitchen for almost a year now! There is not even one small thing that I would change! Every morning that I get up to make my coffee, I remember how blessed we are! We have also added a custom built barn door over the entrance to the laundry/pantry area. It’s just a dreamy as I imagined! The only thing we have left to complete is a resin and live edge table. We went with an 8’ long table, so all of our family could fit there for all get togethers. This is truly the heart of our home and we could not be more happy!*

IMG_7175.jpg

We ended 2018 grateful for so many experiences and adventures.  My favorite undertaking, however, was a major remodel to our kitchen/living space! 

IMG_7176.jpg

The first moment I saw our house 2 1/2 years ago, I loved it.  It took some convincing on Rhett's end, but he came around.  He wanted something new, with fresh paint and new technologies.  I wanted something with character and room to grow.  So like any HGTV couple (ha I wish, right?), we discussed the pros and cons of each and.. I won, with the knowledge that we would eventually want to update the main living space.  

Our goal was to open up the space and be able to host both of our families for holidays and family gatherings.  Soooo, we started planning and I started drawing.  The best part of this whole project was that I was able to do the designing and drawing while my family was able to be our contractors and guiding hand through it all.  The worst part? Living in our home during all of it.  We made one of the bedrooms our "kitchen" and lived out of a crockpot and hot plate for just under two months! But maybe that made us appreciate the finished product even more??

IMG_7177.jpg

We wanted it to feel open and for every space to have a function.  I'm sure by now you know, I'm an organization freak, so I legit laid out what would go into each cabinet.  This was super helpful in the design process, because we were able to visualize how we would be using the space and make changes before we even began.  The two islands gave us the most prep space, plus a multi-functional surface!  We made the eat at island bar height to separate the kitchen from the living space.  Plus it makes for a great present wrapping area! 

IMG_7179.jpg

We went with simple white shaker cabinets with a pop of blue in the eat at island.  Another perk? My parents custom built our cabinets to the exact needs I had cooked up in my head! How lucky are we?? The beverage station was an HGTV dream come true, shiplap and all! It's one of my favorite things about the kitchen (Hello, coffee AND wine!).  I could probably live in the pantry and the laundry room could not be more perfect (did you think you would ever hear someone say that??).

Sooo before you take on a kitchen remodel, Pinterest a whole ton of crockpot recipes, plan for months and months of dust, and enjoy the journey.  It is so much fun picking finishes and seeing your dreams come together!

Ashley WisemanComment
My Evening Skincare Routine

I'm back to talk to you about washing your face again.  I know, I know.  I sound like a broken record and I am not your momma.  But she was right... 

I made a super quick video for my super quick evening skincare routine just for you.  I know that sometimes you are exhausted, and sometimes you just want to face plant onto the bed and not move again.  I'm here to agree with you.  So this is my pro tip.  Wash your face as soon as you get home.  Get yo makeup off.  It is totally fine to sit in the comfort of your home without your pants and/or face on.  

Here is what I do:

1. Remove makeup (for many years I thought this was the same thing as washing your face.  It is not..) I use our Fooops! wipes to remove the majority of my makeup.  Then I go in with our Shea Butter Body Cream to remove my eye makeup! 

2. Next I cleanse my face.  I switch back and forth in the evening depending on my mood and my face between the SeneGence Normal to Oily skincare line and the Oily to Acne.  

3. Then I go in with any treatments or serums.  I use the SeneGence Spot On and Dark Circle Eye Treatment!

4. The final thing that I do is moisturize. And that includes my lips! I use the evening moisturizer on my face and the SeneGence Lip Balm on my lips!! This has to be one of my absolute favorite products! It is liquid gold!!

Now you can lounge in peace and not have to dread an extra step when you are ready for bed!! 

Ashley Wiseman
How to decide what type of skin you have?
 

I have met a lot of people lately, doing makeup for weddings, parties ,proms, etc.  One thing I have learned is that women may know what type of skin they have, but they are not using the correct products on their skin to keep it balanced.  Through my years of selling cosmetics/skincare, I have learned so much about how to properly take care of all skin types.  So let's get into it!

There are generally 4 skin types: dry, normal/dry, normal/oily, oily.  The image on the right shows a general guide to deciding what type of skin you have! The hatched portion shows the oily zone in each different type of skin.  

Here is a break down of each:

Dry: No oiliness, can feel tight and itchy, noticeable fine lines, may have red or rough patches, small mores, visible flaking.

Normal to Dry: No oil in "T" zone, generally healthy appearance, clear with even texture, may have occasional tightness or flaking, small to medium size pores.

Normal to Oily: Oily "T" zone, generally healthy appearance with occasional breakouts or blemishes, pores are medium to large, skin appears shiny and can feel oily.

Oily: All over shiny appearance and oily feeling, blemishes and acne prone, visible discoloration, whiteheads and blackheads, and enlarged pores.

I used to suffer from some pretty serious acne issues and tried all different types of skincare that actually dried my face out!  Believe me when I say I had tried everything! However, I have finally found what works for my skin and I want to help others with the same problems!

Some misconceptions:

"If my face is oily, I shouldn't moisturize." This actually isn't true.  Your body is creating more oil than necessary because it isn't properly hydrated.  The best thing to do here is find a moisturizer that is meant for oily skin and that will help balance out your skin. 

"I don't have any dry skin so I don't need to exfoliate" Also, not true.  Your body replaces skin cells everyday and if you are not removing them, they will begin to build up causing clogged pores.  You can find a gentle exfoliator and use it a couple times a week! It is also important to note that you can over exfoliate, and therefore take away too many oils from your face.  Find a healthy balance that works for you!

Some things that I have learned:

It takes time for your body to get used to a new skincare regimen.  They say that you need to give your skin 6-8 weeks with a product before you can truly know if it is working. And usually it will get worse before it gets better... 

Your skin changes in your 20s and again in your 40s/50s.  Just because you never suffered from dry skin, doesn't mean you won't forever.  One of my favorite face analogies is that of grape, raisins, and cornflakes.  In the image on the left you can see the different layers of these.  When you a young/teenage you have "grape skin".  It is plump, full of collagen, and luminous! As you age, into your 20s-30s your skin loses the collagen.  Your skin becomes the grapes.  This is where you start to notice lines, sagging, drier skin. In your 40s+, you get a layer of dry, dead skin cells that create wrinkles.  No matter how many different skin serums you put on, you are not getting to a layer of skin that can actually accept them! This is why it is so important to exfoliate! Once the dry "cornflake" layer has been removed, the "grapes" can be rehydrated and plumped back up!

Hormones/Gut Health/Hydration play a huge part in how your skin looks and feels! Drink 1/2 your body weight in ounces of water.  Be sure you are eating plenty of leafy greens and nutrition rich foods.  

I hope some of these tips and tricks help you! I know how frustrating it can be to decipher what your skin wants/needs.  And because of that, I would be more then happy to help you figure out what your skin needs and to get you on the right path!

Or you can take a skin care quiz here!

 
Ashley Wiseman
8 uses for ShadowSense
 

Hi friends!

I'm here today to talk about my absolute favorite SeneGence product, ShadowSense!! (woot woot!)  This one product can be used in 8 different ways! Which makes the day to day getting ready much simpler and travel even easier!

IMG_6585.jpg

1. Eye Liner - There are multiple ways to apply the ShadowSense as eyeliner.  1.) Take an angled brush or a small smudgey brush and apply the color to the desired area! 2.) Take the tip of the ShadowSense applicator and glide the product on your eye lid or under your eye! These products are buildable so you can go as light or dark as you want!

Recommended colors: Onyx or Rustic Brown! Or any of the super fun eye shadows to add a little flair!

IMG_6580.jpg

2. Brows - I use a small angle brush to fill in my eye brows. Remember, they aren't supposed to be twins, just sisters! And sometimes even just cousins!
Recommended colors: Garnet, Moca Java, Rustic Brown, Onyx  It depends are your hair color, but I'm always available to help! You can also mix colors to create your perfect eye brow shade!

IMG_6581.jpg


3. Blush - You can dot the ShadowSense directly on your skin or brush a little onto your brush of choice! The great thing is you can always get the intensity that you are looking for!

Recommended colors: Mulberry, Pink Posey, Pink Hibiscus Shimmer, Rose Gold Glitter

IMG_6583.jpg

4. Concealer - The great things about using SeneGence concealer or ShadowSense as concealer is that there is skincare in it! So as you cover up a blemish, you are also adding a layer of skincare to it! How great is that?! I just dot a small amount where I need it and blend it in with a brush!

Recommended colors: Candlelight ( this color has a tint of peach to it, so it is great for underage to conceal any dark circles!), Sandstone Pearl

IMG_6586.jpg

5. Highlight - Swipe a little bit of the ShadowSense onto the brush or applicator of your choosing and glide it onto the hight points of your face ( cheekbones, nose, brow bones, and cupids bow)!

Recommended colors: Snow, Sandstone Pearl Shimmer, Pink Opal Shimmer

IMG_6588.jpg


6. Contour - This is still a new one for me, but I use ShadowSense on the hollow points on my cheeks and a little down each side of my noes!  Anywhere a shadow would be created on your face, that is where you contour.  You can also add contour to your hair line and to the underside of your jaw bone to make your face look more sculpted.

Recommended colors: Moca Java, Garnet, Rustic Brown

IMG_6590.jpg


7. Lips - This is one of coolest uses for ShadowSense because a lot of people don't know about it! All you have to do is layer the ShadowSense of your choosing between layers of a neutral LipSense color, such as Bombshell or Cappuccino!  OR we actually created a clear LipSense that allows you to do the same thing! So for example, you can use Palm Glitter ShadowSense between layers of Bombshell LipSense and get a soft green lip color! How cool is that??

Recommended colors: Anything you want! 

IMG_6591.jpg

8. Eye Shadow - You have multiple different ways to apply the ShadowSense for eye shadow! My favorite way to apply it is to apply a small amount to a brush and glide it onto my eye lid.  You can also dot a small amount directly onto the eye lid.  However, these products are super pigmented, so a little bit goes a long way! You can always add more, but once the color is set, it is there to stay!


And that brings us to the end! This is my absolute favorite color cosmetic that SeneGence makes and you will love it too! Plus one tube lasts forever and it's only $22!! Message me for details!!

 
Ashley Wiseman